// get the owner family of the family document.
Family family = familyDoc.OwnerFamily;
Parameter param = family.get_Parameter(BuiltInParameter.FAMILY_WORK_PLANE_BASED);
// this param is a Yes/No parameter in UI, but an integer value in API
// 1 for true and 0 for false
int isTrue = param.AsInteger();
// param.Set(1); // set value to true.
// create a new family document using Generic Model.rft template string templateFileName = @"C:\Documents and Settings\All Users\Application Data\Autodesk\RST 2011\Imperial Templates\Generic Model.rft";
Document familyDocument = application.NewFamilyDocument(templateFileName); if (null == familyDocument) { thrownew Exception("Cannot open family document"); }
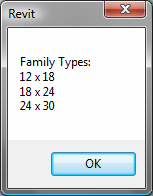
publicvoidGetLoadedSymbols(Autodesk.Revit.DB.Document document, FamilyInstance familyInstance) { if (null != familyInstance.Symbol) { // Get family associated with this Family family = familyInstance.Symbol.Family;
// Get Family document for family Document familyDoc = document.EditFamily(family); if (null != familyDoc && familyDoc.IsFamilyDocument == true) { String loadedFamilies = "FamilySymbols in " + family.Name + ":\n"; FilteredElementCollector collector = new FilteredElementCollector(document); ICollection collection = collector.OfClass(typeof(FamilySymbol)).ToElements(); foreach (Element e in collection) { FamilySymbol fs = e as FamilySymbol; loadedFamilies += "\t" + fs.Name + "\n"; }
// make sure we have a family document if (true == document.IsFamilyDocument) { // define the profile for the extrusion CurveArrArray curveArrArray = new CurveArrArray(); CurveArray curveArray1 = new CurveArray(); CurveArray curveArray2 = new CurveArray(); CurveArray curveArray3 = new CurveArray();
// create a rectangular profile XYZ p0 = XYZ.Zero; XYZ p1 = new XYZ(10, 0, 0); XYZ p2 = new XYZ(10, 10, 0); XYZ p3 = new XYZ(0, 10, 0); Line line1 = Line.CreateBound(p0, p1); Line line2 = Line.CreateBound(p1, p2); Line line3 = Line.CreateBound(p2, p3); Line line4 = Line.CreateBound(p3, p0); curveArray1.Append(line1); curveArray1.Append(line2); curveArray1.Append(line3); curveArray1.Append(line4);
if (null != rectExtrusion) { // move extrusion to proper place XYZ transPoint1 = new XYZ(-16, 0, 0); ElementTransformUtils.MoveElement(document, rectExtrusion.Id, transPoint1); } else { thrownew Exception("Create new Extrusion failed."); } } else { thrownew Exception("Please open a Family document before invoking this command."); }
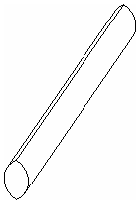
// make sure we have a family document if (true == document.IsFamilyDocument) { // Define a profile for the sweep CurveArrArray arrarr = new CurveArrArray(); CurveArray arr = new CurveArray();
// Create an ovoid profile XYZ pnt1 = new XYZ(0, 0, 0); XYZ pnt2 = new XYZ(2, 0, 0); XYZ pnt3 = new XYZ(1, 1, 0); arr.Append(Arc.Create(pnt2, 1.0d, 0.0d, 180.0d, XYZ.BasisX, XYZ.BasisY)); arr.Append(Arc.Create(pnt1, pnt3, pnt2)); arrarr.Append(arr); SweepProfile profile = document.Application.Create.NewCurveLoopsProfile(arrarr);
// Create a path for the sweep XYZ pnt4 = new XYZ(10, 0, 0); XYZ pnt5 = new XYZ(0, 10, 0); Curve curve = Line.CreateBound(pnt4, pnt5);
CurveArray curves = new CurveArray(); curves.Append(curve);
if (null != sweep) { // move to proper place XYZ transPoint1 = new XYZ(11, 0, 0); ElementTransformUtils.MoveElement(document, sweep.Id, transPoint1); } else { thrownew Exception("Failed to create a new Sweep."); } } else { thrownew Exception("Please open a Family document before invoking this command."); }
publicvoidAssignSubCategory(Document document, GenericForm extrusion) { // create a new subcategory Category cat = document.OwnerFamily.FamilyCategory; Category subCat = document.Settings.Categories.NewSubcategory(cat, "NewSubCat");
// create a new material and assign it to the subcategory ElementId materialId = Material.Create(document, "Wood Material"); subCat.Material = document.GetElement(materialId) as Material;
// assign the subcategory to the element extrusion.Subcategory = subCat; }
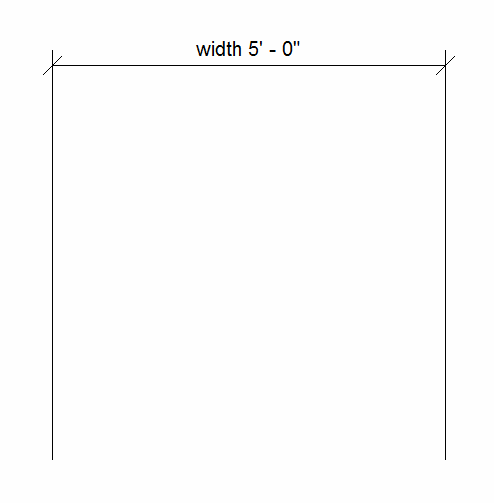
public Dimension CreateLinearDimension(Document document) { // first create two lines XYZ pt1 = new XYZ(5, 5, 0); XYZ pt2 = new XYZ(5, 10, 0); Line line = Line.CreateBound(pt1, pt2); Plane plane = Plane.CreateByNormalAndOrigin(pt1.CrossProduct(pt2), pt2); SketchPlane skplane = SketchPlane.Create (document, plane); ModelCurve modelcurve1 = document.FamilyCreate.NewModelCurve(line, skplane);
pt1 = new XYZ(10, 5, 0); pt2 = new XYZ(10, 10, 0); line = Line.CreateBound(pt1, pt2); plane = Plane.CreateByNormalAndOrigin(pt1.CrossProduct(pt2), pt2); skplane = SketchPlane.Create (document, plane); ModelCurve modelcurve2 = document.FamilyCreate.NewModelCurve(line, skplane);
// now create a linear dimension between them ReferenceArray ra = new ReferenceArray(); ra.Append(modelcurve1.GeometryCurve.Reference); ra.Append(modelcurve2.GeometryCurve.Reference);
pt1 = new XYZ(5, 10, 0); pt2 = new XYZ(10, 10, 0); line = Line.CreateBound(pt1, pt2);
Dimension dim = document.FamilyCreate.NewLinearDimension(document.ActiveView, line, ra);
// create a label for the dimension called "width" FamilyParameter param = document.FamilyManager.AddParameter("width", BuiltInParameterGroup.PG_CONSTRAINTS, ParameterType.Length, false);
publicvoidCreateAndSetVisibility(Autodesk.Revit.DB.Document familyDocument, SketchPlane sketchPlane) { // create a new ModelCurve in the family document XYZ p0 = new XYZ(1, 1, 0); XYZ p1 = new XYZ(5, 1, 0); Line line1 = Line.CreateBound(p0, p1);
// create a new ModelText along ModelCurve line ModelText text = familyDocument.FamilyCreate.NewModelText("Hello World", null, sketchPlane, p0, HorizontalAlign.Center, 0.1);
// set visibility for text FamilyElementVisibility textVisibility = new FamilyElementVisibility(FamilyElementVisibilityType.Model); textVisibility.IsShownInTopBottom = false; text.SetVisibility(textVisibility);
// set visibility for line FamilyElementVisibility curveVisibility = new FamilyElementVisibility(FamilyElementVisibilityType.Model); curveVisibility.IsShownInCoarse = false; modelCurve1.SetVisibility(curveVisibility);
publicvoidEditFamilyTypes(Document document, FamilyInstance familyInstance) { // example works best when familyInstance is a rectangular concrete element
// Get family associated with this Family family = familyInstance.Symbol.Family; if (null == family) { return; // could not get the family }
// Get Family document for family Document familyDoc = document.EditFamily(family); if (null == familyDoc) { return; // could not open a family for edit }
FamilyManager familyManager = familyDoc.FamilyManager; if (null == familyManager) { return; // cuould not get a family manager }
// Start transaction for the family document using (Transaction newFamilyTypeTransaction = new Transaction(familyDoc, "Add Type to Family")) { int changesMade = 0; newFamilyTypeTransaction.Start();
// add a new type and edit its parameters FamilyType newFamilyType = familyManager.NewType("2X2");
if (newFamilyType != null) { // look for 'b' and 'h' parameters and set them to 2 feet FamilyParameter familyParam = familyManager.get_Parameter("宽度"); if (null != familyParam) { familyManager.Set(familyParam, 2.0); changesMade += 1; }
if (2 == changesMade) // set both paramaters? { newFamilyTypeTransaction.Commit(); } else// could not make the change -> should roll back { newFamilyTypeTransaction.RollBack(); }
// if could not make the change or could not commit it, we return if (newFamilyTypeTransaction.GetStatus() != TransactionStatus.Committed) { return; } }
// now update the Revit project with Family which has a new type LoadOpts loadOptions = new LoadOpts();
// This overload is necessary for reloading an edited family // back into the source document from which it was extracted family = familyDoc.LoadFamily(document, loadOptions); if (null != family) { // find the new type and assign it to FamilyInstance ISet familySymbolIds = family.GetFamilySymbolIds(); foreach (ElementId id in familySymbolIds) { FamilySymbol familySymbol = family.Document.GetElement(id) as FamilySymbol; if ((null != familySymbol) && familySymbol.Name == "2X2") { using (Transaction changeSymbol = new Transaction(document, "Change Symbol Assignment")) { changeSymbol.Start(); familyInstance.Symbol = familySymbol; changeSymbol.Commit(); } break; } } } }